

Kathleen posted on Facebook recently about making up a batch of quote posts to use on social media. She said she was fine with them repeating occasionally. The goal was simply to have a bunch of social media posts ready to avoid gaps in posting.
I’m generating the reminder graphics for our next Bible study series. So, I thought I’d write up how to quickly generate a bunch of images that are all the same except for the text. The same method applies for quote graphics. This is a tutorial for Photoshop.
Teach Photoshop to batch save
Just once, the very first time you do this, you’ll need to setup an “action” that saves a .psd (Photoshop) file as a .png (portable network graphics) file. So, let’s get that out of the way first.
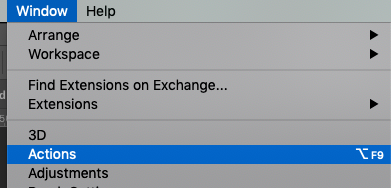
Start with a new Photoshop file. Then, go to Windows > Actions, to get your actions window to open up.
Click the folder icon at the bottom of the action window to create a folder to put your own actions in.
![]()
Click on the little “new document” (post-it note?) icon to create a new action in that folder.
![]()
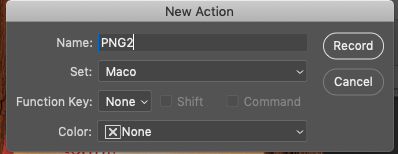
Give it a name. I know the screenshot says PNG2 is my name. That’s because I already did this once with the perfectly logical name “Save as PNG”. When you hit the “Record” button, it will start recording your actions.
So, at that point, go through the ordinary process of File > Safe As and setting the format to PNG. Ignore the warning icons.

When all done with saving, you’ll be staring back at your Photoshop screen going “so…what do I do now?” Then you might notice the little red “record” light at the bottom of the action window. Ah ha! Click the “stop” icon to its left.
![]()
That completes the process of making a “save as PNG” action for later batch use.
Every other time you generate graphics, you’ll just start at the next bit.
Prepare your data
First, I make a .csv file with the fields I’m going to need for the graphic. In this case, I need the date, the lesson topic, and the passage being studied. I have put tabs between the 3 columns. You can also do this by typing it into a spreadsheet (Microsoft Excel, Google Sheets, LibreOffice Calc, etc.) and saving as a .csv file. I did it in a text editor because it was easy to copy the list from the webpage for the Bible study guides.
date	lesson	verse
June 5	On Holy Ground	(Exodus 3:1–22)
June 12	God’s Power	(Exodus 4:1–9)
June 19	Help in Hard Times	(Exodus 5:10–23)
June 26	Go and Tell	(Exodus 6:10–30)
July 3	To Trust in God	(Exodus 14:1–4, 10–22)
July 10	God Provides	(Exodus 15:1, 13–24; 16:28–36; 17:1–3)
July 17	How We Help Each Other	(Exodus 17:8–16)
July 24	Encountering God	(Exodus 19:1–9, 16–25)
July 31	Honoring the Lord	(Exodus 20:1–11)
August 7	Keeping Relationships Healthy	(Exodus 20:12–21)
August 14	God Goes before Us	(Exodus 23:20–33)
August 21	God with Us	(Exodus 33:12–23; 34:4–9)
August 28	An Offering to the Lord	(Exodus 35:4–9, 20–21, 30—36:1)
For quote graphics, you’d need the quote and the name of the person being quoted.
Set up the graphic file
First, go ahead and design your graphic. Give your text layers useful names instead of “Layer 3” or “Lorem ipsum.” Make sure any text you want to automatically word-wrap, you create by drawing a text box, not just clicking. Get your font sizes and everything sorted out.

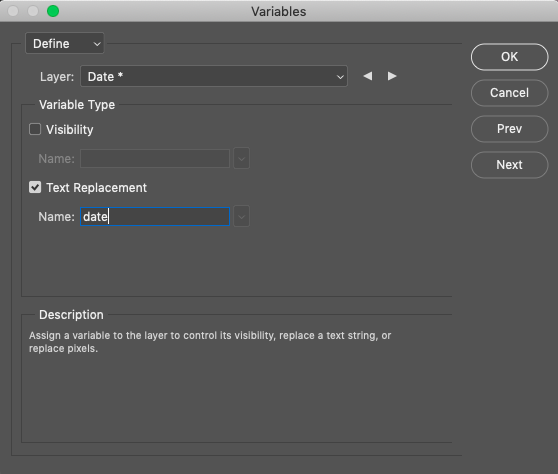
Go to Image > Variables > Define, to define your data variables.

For every layer where you want to set the text, check the “Text Replacement” box. Enter in the column name you used in your .csv file. For example, my three variables are date, lesson, and verse. For layers that should be the same every time, don’t check any boxes.
Match the .csv to the graphic
Go to Image > Variables > Data Sets to define the datasets.

Click the import button and select the .csv file you made earlier.
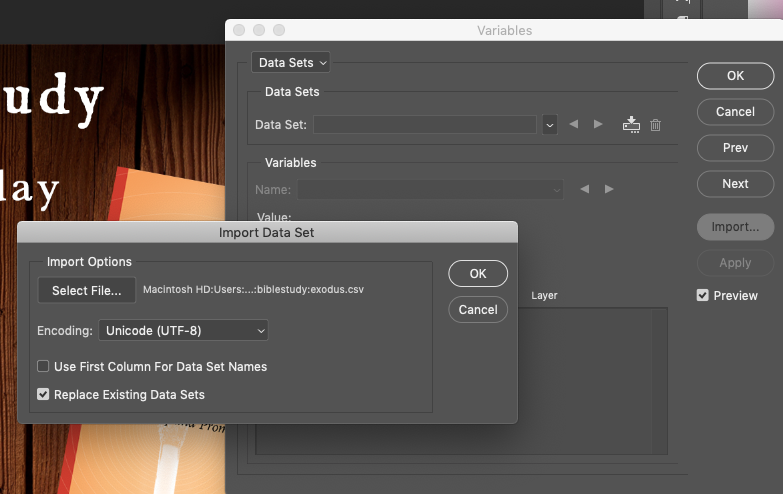
If the .csv file’s first row (column names) match the variables you set before, you’ll see this screen next. If not, you’ll get an error message telling you that it doesn’t match. Hit Apply and OK.
Make a bunch of files
Now we can generate a folder full of Photoshop files. There’ll be one for each variation. Which is also to say, one for each row in your spreadsheet. That means if you notice a typo later, you can go back and fix it. Go to File > Export > Data Sets as Files
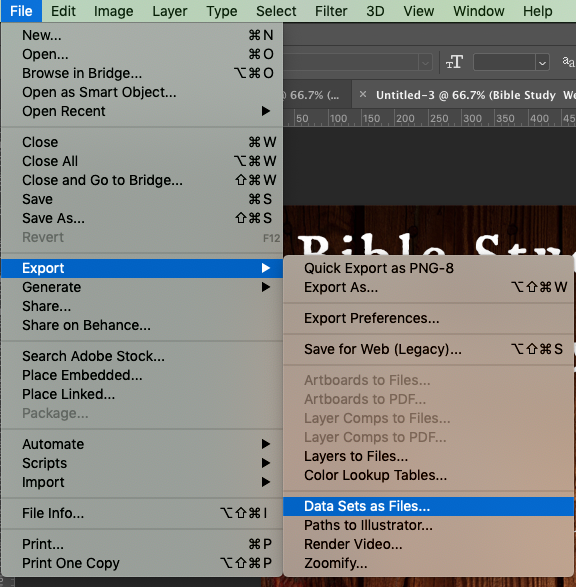
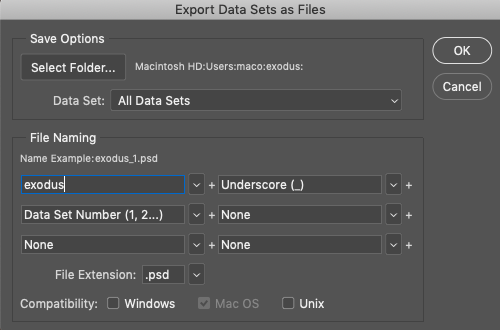
In the dialog box that comes up, set where you want the generated files to end up. I recommend making a folder for them so they don’t splat all over your desktop or home folder. Set what you want the filename pattern to be.
There’ll be a loading bar once you start it running. You’ll see the files appearing in the folder you created.
Convert those Photoshop files to PNG
Unfortunately, it only can create Photoshop files from the data set by default. We have to do one more step. This one will make it wander through that folder full of files it just made and create PNG versions of the files. Remember that PNG action we created way at the beginning? Now we use it.
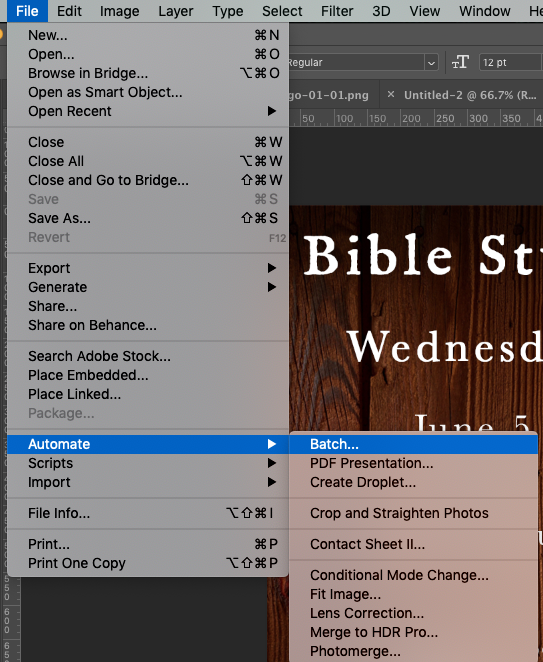
Go to File > Automate > Batch.
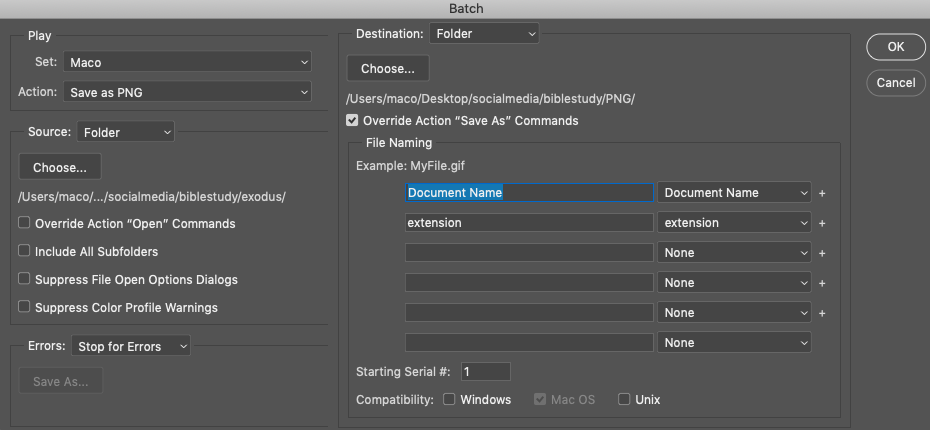
Set the source folder. That’s where the Photoshop files appeared in the last step. Set the destination folder. That’s where you want the PNG files to go. It should be a different folder. (I like making it a folder named “PNG” inside the previous folder.) Select the action you created at the beginning. If you don’t see your action in Action dropdown, look just above it. Is the “Default Actions” set selected? You’ll need to switch to your own custom action set. Ensure that the checkbox for “Override Action ‘Save As’ command” is selected.
Once you hit OK, you’ll get another loading bar as it rapidly opens every Photoshop file in the folder and saves it as a PNG for you. Go ahead and wander through the folder uploading them to whatever you use for scheduling social media posts.


Recent Comments